> ## Documentation Index
> Fetch the complete documentation index at: https://docs.thig.ai/llms.txt
> Use this file to discover all available pages before exploring further.
# Onboarding
> Get started with thig.ai — your first steps after signing up
# Onboarding
When you first sign up for thig.ai, the dashboard walks you through a guided onboarding flow to help you set up your workspace and create your first PRD.
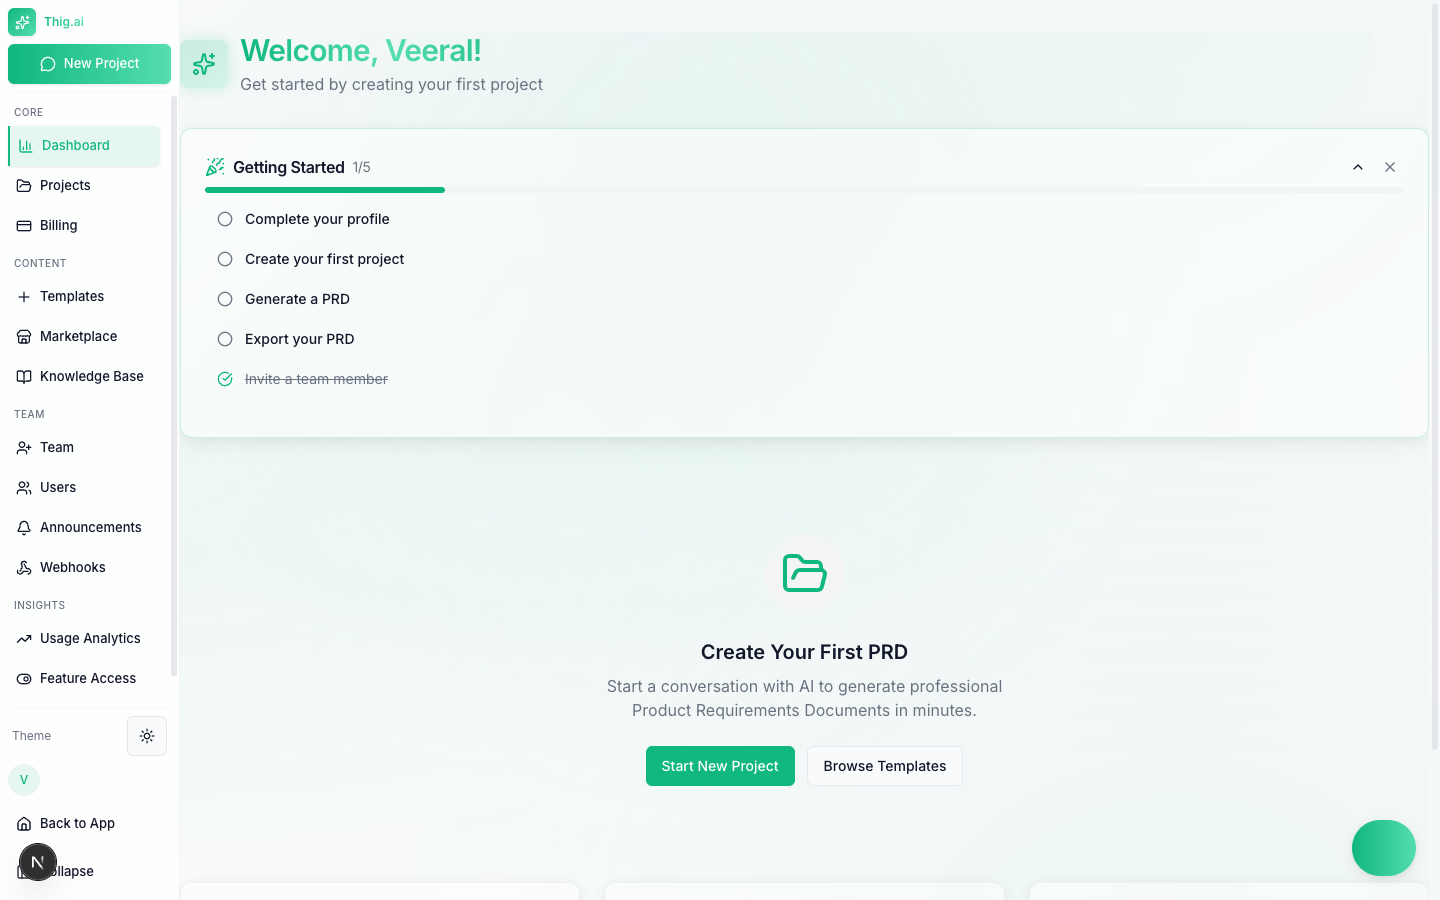 ## Getting Started Checklist
The dashboard displays a progress checklist with five steps. Each step links directly to the relevant page.
| Step | Action | Where |
| ---- | ------------------------- | ---------------------------------------------------------------------- |
| 1 | Complete your profile | [AI Profile Settings](/user-guide/profile) (`/admin/settings/profile`) |
| 2 | Create your first project | [Chat](/user-guide/ai-chat) (`/chat`) |
| 3 | Generate a PRD | Happens during the AI conversation |
| 4 | Export your PRD | [Exports](/user-guide/exports) (from the review page) |
| 5 | Invite a team member | [Team Management](/user-guide/team-management) (`/admin/team`) |
A progress indicator (e.g., "1/5 completed") tracks how far along you are. You can collapse or dismiss the checklist at any time.
## Quick Actions
Below the checklist, quick action cards give you immediate entry points:
* **Start New Project** — Opens the AI chat to begin a new PRD conversation
* **Browse Templates** — Jump to the [Template Marketplace](/user-guide/marketplace) to pick a starting structure
## Feature Highlights
The onboarding page introduces the three core capabilities of the platform:
### AI Conversations
Describe your product idea in natural language. The AI asks targeted follow-up questions to gather requirements, then structures them into a professional PRD.
### AI Wireframes
Auto-generate user flow diagrams, architecture diagrams, and wireframe sketches directly from your PRD content using Mermaid visualizations.
### Export Anywhere
Once your PRD is ready, export it in six formats: PDF, Word (DOCX), HTML, Markdown, Notion, or Google Docs.
## Tips for New Users
Set up your [AI Profile](/user-guide/profile) first. Adding your role, industry, and tech stack helps the AI produce more relevant and tailored PRDs from the start.
Use **Cmd+K** (Mac) or **Ctrl+K** (Windows) to open the Command Palette. It is the fastest way to navigate to any page, project, or setting.
* **Start with a template** — The marketplace has 12 industry-specific templates that give the AI a strong starting structure. You can always customize the output.
* **Iterate in chat** — You do not need to get everything right in one conversation. Come back to the chat and refine sections as your thinking evolves.
* **Invite your team early** — Collaboration features like comments, real-time presence, and shared templates work best with the whole team on board.
The onboarding checklist is only shown for new accounts. Once all steps are complete (or the checklist is dismissed), the dashboard switches to the standard stats and project overview.
## Getting Started Checklist
The dashboard displays a progress checklist with five steps. Each step links directly to the relevant page.
| Step | Action | Where |
| ---- | ------------------------- | ---------------------------------------------------------------------- |
| 1 | Complete your profile | [AI Profile Settings](/user-guide/profile) (`/admin/settings/profile`) |
| 2 | Create your first project | [Chat](/user-guide/ai-chat) (`/chat`) |
| 3 | Generate a PRD | Happens during the AI conversation |
| 4 | Export your PRD | [Exports](/user-guide/exports) (from the review page) |
| 5 | Invite a team member | [Team Management](/user-guide/team-management) (`/admin/team`) |
A progress indicator (e.g., "1/5 completed") tracks how far along you are. You can collapse or dismiss the checklist at any time.
## Quick Actions
Below the checklist, quick action cards give you immediate entry points:
* **Start New Project** — Opens the AI chat to begin a new PRD conversation
* **Browse Templates** — Jump to the [Template Marketplace](/user-guide/marketplace) to pick a starting structure
## Feature Highlights
The onboarding page introduces the three core capabilities of the platform:
### AI Conversations
Describe your product idea in natural language. The AI asks targeted follow-up questions to gather requirements, then structures them into a professional PRD.
### AI Wireframes
Auto-generate user flow diagrams, architecture diagrams, and wireframe sketches directly from your PRD content using Mermaid visualizations.
### Export Anywhere
Once your PRD is ready, export it in six formats: PDF, Word (DOCX), HTML, Markdown, Notion, or Google Docs.
## Tips for New Users
Set up your [AI Profile](/user-guide/profile) first. Adding your role, industry, and tech stack helps the AI produce more relevant and tailored PRDs from the start.
Use **Cmd+K** (Mac) or **Ctrl+K** (Windows) to open the Command Palette. It is the fastest way to navigate to any page, project, or setting.
* **Start with a template** — The marketplace has 12 industry-specific templates that give the AI a strong starting structure. You can always customize the output.
* **Iterate in chat** — You do not need to get everything right in one conversation. Come back to the chat and refine sections as your thinking evolves.
* **Invite your team early** — Collaboration features like comments, real-time presence, and shared templates work best with the whole team on board.
The onboarding checklist is only shown for new accounts. Once all steps are complete (or the checklist is dismissed), the dashboard switches to the standard stats and project overview.